
Branding
Brand Launch Checklist: Connect Your Logo, Packaging, Print and Website
Plan a consistent business launch with one brief, clear approvals and coordinated artwork. Includes a practical checklist for packaging, signage and your website.

The quick answer
Begin with the customer journey and the items needed for launch. Agree the identity and product facts, confirm production specifications, approve each application and test the public contact or purchase route before release.
The logo is approved, but the sign maker has an older version. Packaging lists one contact number while the website shows another. Each item can look good on its own and still create a confusing launch.
A connected brand launch uses one source of approved information and clear handovers. You can still commission a small job or phase the work. The point is to identify what depends on what before a print order or opening date becomes difficult to change.
Start With the Customer Journey and the Launch Scope
Write how someone will first notice the business, understand the offer and make contact or buy. A retail launch might move from a storefront to a pack and then to a website. An online service may need only a clear identity, a website and useful enquiry information at the start.
List what is required now, what can follow later and what you already have. A visiting card, label or single service page can be a valid first phase. Avoid ordering every possible item just because it appears in a launch package.
| Launch surface | Decision it should support | Input needed before design |
|---|---|---|
| Logo and identity | Recognise the same business | Approved name, audience and applications |
| Pack or label | Identify the product and correct variant | Product facts, dimensions, copy and supplier template |
| Print and signage | Understand the offer at the real viewing size | Measured layout, materials and production specification |
| Website | Find information and take the next action | Page purpose, approved assets and working contact route |
Approve the Inputs in the Order Other Work Depends on Them
Finalise the name and product information before preparing final production files. Confirm the packaging structure and sign dimensions with the production supplier. Review mockups for presentation, then approve the specified artwork and suitable proof for production.
Set milestones around approvals and supplier lead times, not only design dates. A late pack-size change can alter panel layouts, images and website product information. Make the dependency visible while there is still time to respond.
- Agree the inputsName, offer, copy, dimensions and owners.
- Approve applicationsIdentity, artwork and appropriate proofs.
- Release and testNamed files, supplier handovers and the enquiry route.
- Agree the launch scope and assign an owner to each item.
- Approve the identity, final copy and product or service facts.
- Confirm pack templates, measured sign layouts and website requirements.
- Review application designs and the appropriate production proofs.
- Release named, versioned files and test the customer-facing journey.
Use Project Evidence to Review the Connected Pieces
Rominus shows identity applications from the fascia into the restaurant setting, with original opening-day and installation photographs. It is useful for discussing how the mark appears at different physical touchpoints.
Poly VSP’s original cartons and supporting artwork show a different requirement: keep the brand recognisable while separating product types and specification information. Check the right data against each artwork in a range.
Jaipur Moonlight’s working website preview shows dedicated pages and an enquiry route for plan type, date and group size. Together these are examples from separate project records, not one combined client launch or proof of a measured increase in sales.
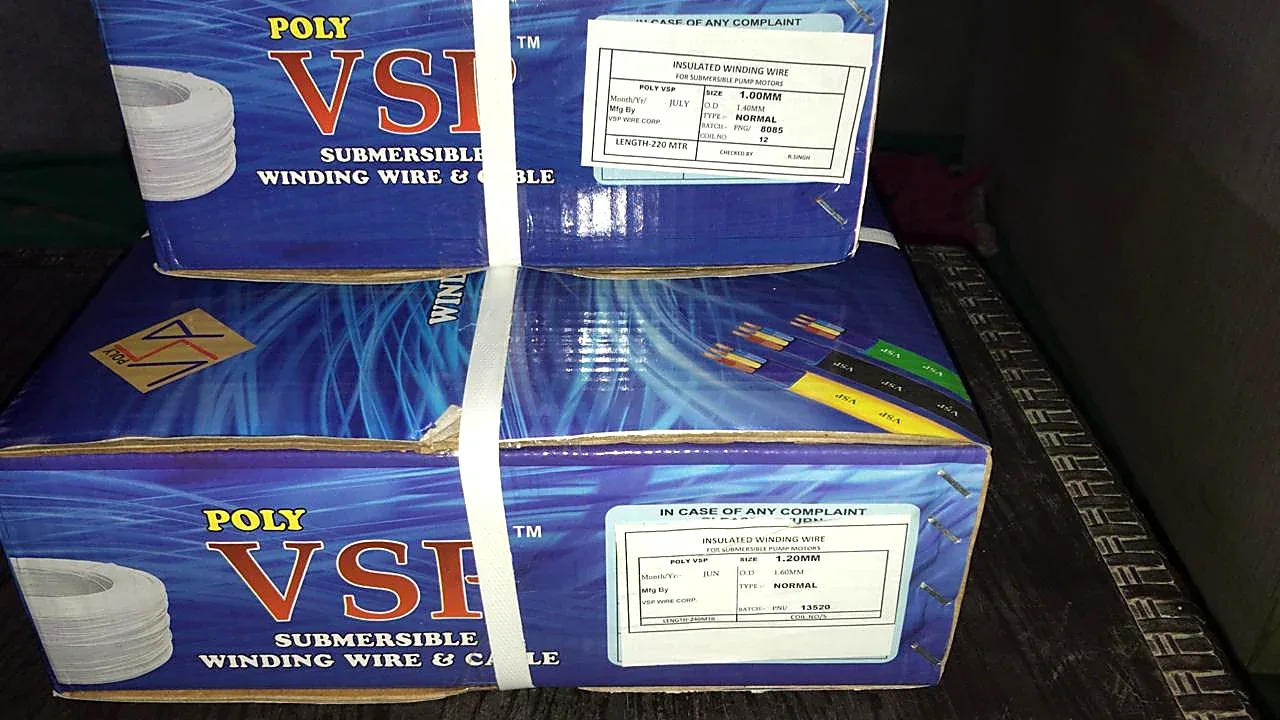
Rominus: identity and restaurant signage · Poly VSP: packaging and product communication · Jaipur Moonlight: website and campaign presentation
Use a Launch Handover Checklist for Every Item
Record the approved filename, version, quantity or placement, receiving supplier and approver. For physical work, include the agreed dimensions, material and finish. For digital work, include the public destination and who can update it.
One coordinated studio can manage several of these handovers when they are included in the scope. Separate suppliers can also work well with a clear owner and approved inputs. Compare the actual responsibilities rather than assuming coordination comes automatically with a package.
| Before release | Question to answer | Evidence to keep |
|---|---|---|
| Artwork | Is this the approved version for this application? | Filename and dated sign-off |
| Production | Do dimensions, material and quantity match the order? | Specification and suitable proof |
| Website | Do offer, contacts and next action match the launch? | Checked pages and receiving-team test |
| Release | Who authorises printing, installation or publication? | Named decision and release record |
Check the production artwork before it leaves your team · Review product details and packaging proofs
Walk Through the Launch as a Customer
Read the sign or printed piece at a realistic size. Compare the product and contact information across the pack, website and public profiles. Scan printed QR codes and confirm their intended destination.
On a phone, find the relevant offer and complete an authorised enquiry test. Check what the receiving team sees. Opening WhatsApp or clicking a button is different from receiving a message, so record those steps separately.
After release, log corrections and actual customer questions. Use enquiry quality and search data when available to decide what needs improving next. Share your priority items with Zaapart to discuss one service or a coordinated launch scope.
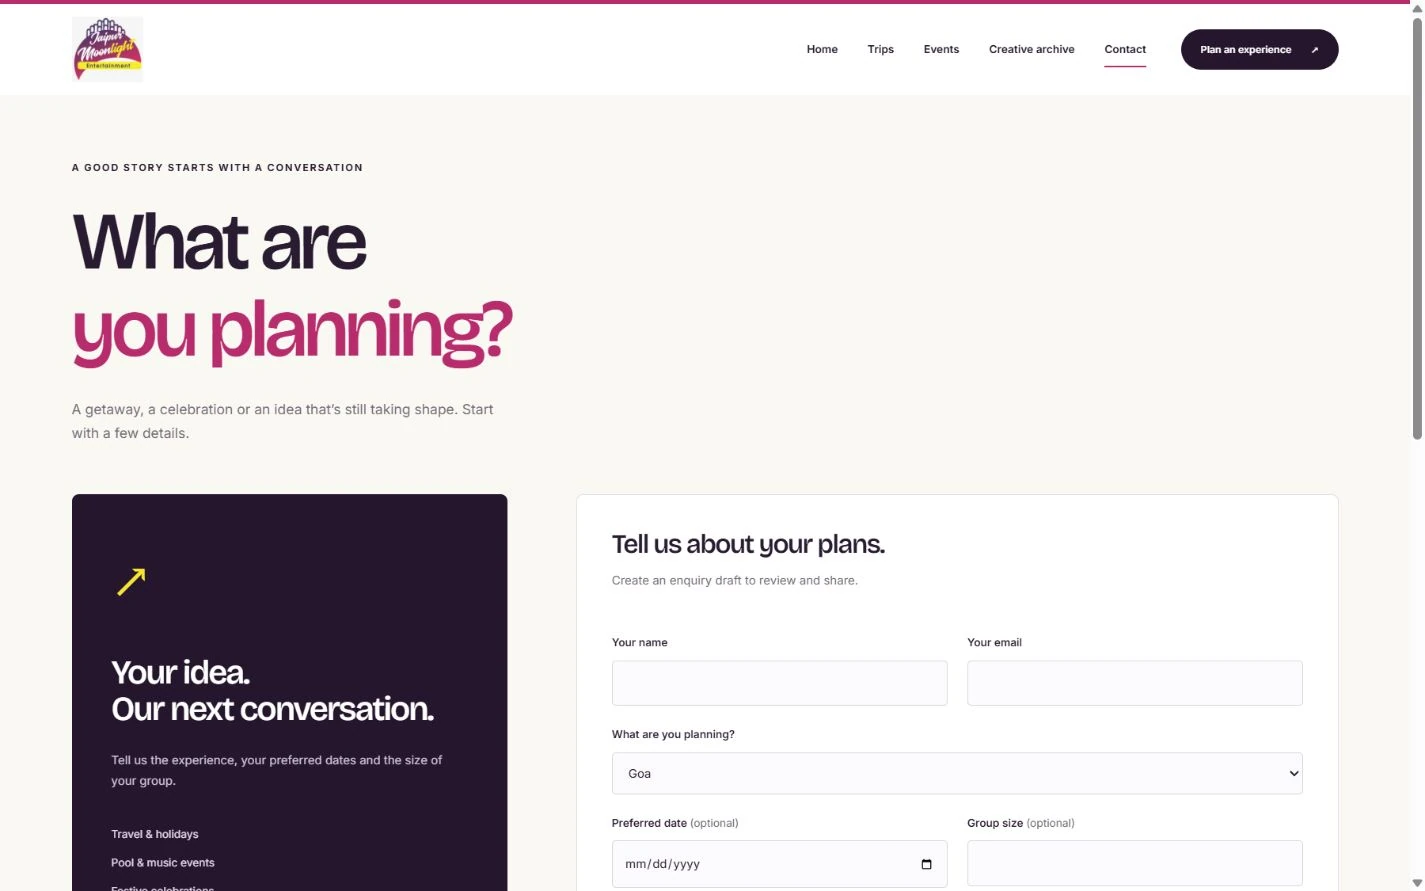
Test the website enquiry journey · Explore individual services and connected project work